Check out the Kooky Critters!

Meow

Monkey Love

Two Heads Are Better Than One

Best Mates
|
|
|


My sisters wedding is this weekend and a summers worth of wedding creativity will finally all come together. We have made so many things for the wedding - programs, favors, aisle decorations, place cards, table numbers, centerpieces, necklaces, you name it we have made it.
One of my favorite projects is the aisle decorations. They were so easy to make and because we used silk hydrangea petals for them, they were are great make ahead.
We are hanging them from hooks about every 3 rows down each side of the aisle.
Here are the supplies needed:
Styrofoam ball (8-10 inches)
green spray paint
sheet moss
spray adhesive
silk hydrangea flower
green floral wire
2 yards wide ribbon
long pearl pins
Steps:
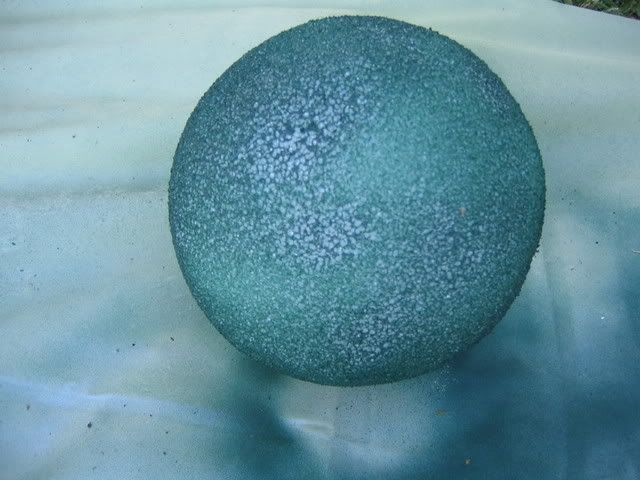
Spray paint the Styrofoam ball with a green color. This prevents any "peek a boos" through the moss.
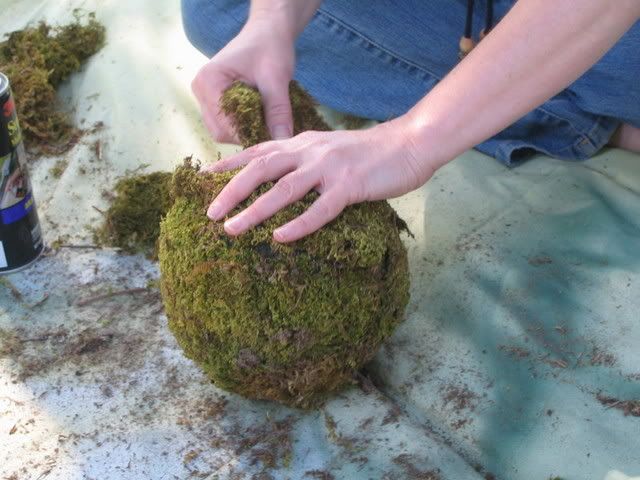
Working outside and on a protected surface, spray the spray adhesive on the backside of the moss and attach around the ball. The sheet style moss works really well. Fill in any holes with smaller pieces of moss.
Wrap a piece of floral wire around the ball, twist the wire to secure, and trim the edges.
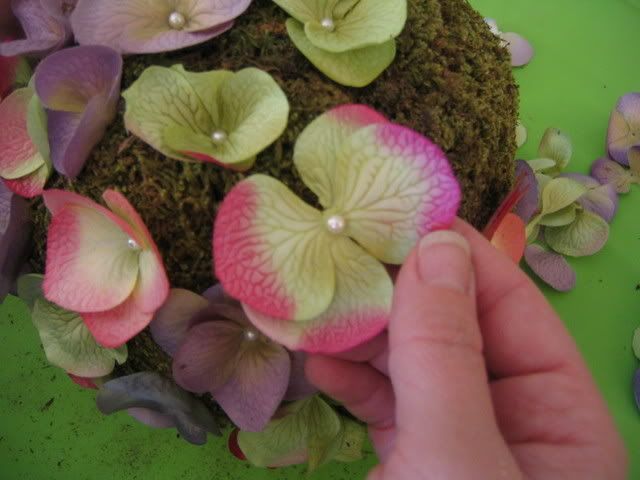
Break apart the silk hydrangea flower and pin the petals to the ball by piercing through the center of the petal and into the ball. Continue until the entire ball is covered. The longer pins stay really well. You could use a drop of glue for security.
Cut the ribbon in half so you have 2 - 1 yard pieces. Thread one piece through the wire (move a pin if needed) and and tie a knot at the desired hanging length. Bring the knot toward the base of the ball and trim the ends of the ribbon. Hide the knot by using the remaining ribbon to tie a bow at the base of the ball. Trim the ribbon ends.
We have done tons of wedding projects on Creative Juice....here is a link to some of the ideas - Bridal Ideas and Floral Ideas.
Well my folks just called and they are on their way over so I better run and get ready!
Have a creative week and for all you brides and grooms - wedding wishes.
Cathie


I can't believe we got a front window display!
The king of DIY takes over Barnes and Noble!
Nice Display
Creative Juice Crafty Peeps
Steve, Eddie (my hubby)and Greg
Sooooo many bottle caps and books!
Visit us on the rest of the tour!
July 26 - Pleasanton, CA (7:30 pm) - Town Center Books
Catch us on ABC-7, View From The Bay (7-26)
Bottle Cap Charm Instructions:
bottle caps
small images
1" circle punch
diamond glaze
sewing pin
tacky glue
small nail
hammer
wooden board
1. If you want to use a jump ring: punch one hole through the rim of each bottle cap with a hammer and nail. Use an old wood board as a work surface. If you want to glue the charm: you will not need to punch a hole.
2. Use the 1" circle punch to cut the image into a circle. Glue the image to the to the inside of the bottle cap and allow to dry. If you punched a hole: Make sure the image is facing up, toward the punched hole.
4. Seal the image with a thick coating of Diamond Glaze and allow it to dry following the manufacturer's instructions. If you get an air bubble, poke the bubble with a sewing pin. Allow to dry unmoved for at least 24 hours.
6. To make a single pendant, use jewelry pliers to attach a jump ring through the punched hole and slide onto a necklace.
7. Glue to findings, frames, magnets, etc using a strong glue like E6000.

 Tune in July 13th for Living Live! We will be Re-crafting soy candles and giving them a bit of Hawaiian flair. We had so much fun with Florence and Meshach last time and we are thrilled to be getting crafty with them again.
1. Determine the amount of wax needed by filling the glass container with water, pouring the water from the container into a measuring cup and making note of the amount. One pound of melted soy wax will make 2-1/4 c. liquid wax.
2. Attach the metal wick base to one end of the wick, following instructions on the package. Tie the other end of the wick to the center of a pencil; balance the pencil across the opening of the glass jar (make sure the container is dry). The pencil will keep the wick straight during the pouring and cooling stages.
3. Stove Top Melting Method: Fill one-third of the pan with water and bring to a boil. Place unmelted wax in a glass measuring cup and sit the cup in the boiling water (this is a homemade double boiler).
4. Microwave Melting Method: Place desired amount of soy wax in a large glass measuring cup. Melt on medium temperate in short intervals. (1 minute at a time) The time it takes will depend on your microwave and the amount of wax you're melting.
5. Place the thermometer in the wax and monitor the temperature, stirring as needed, until the melted wax has reached a temperature of 160 degrees (never heat above 160 degrees).
6. Wearing oven mitts, place the melted wax on a heatproof surface. Add fragrance oil after the temperature drops to 125 degrees; stir thoroughly. The intensity of fragrance is a personal preference: add more drops for a stronger scent. A good guideline is between 20 to 40 drops.
7. When the cooling wax reaches 110 degrees, pour it very slowly into a container to just below the rim. Check to make sure the wick is centered and taut before placing the container, away from cool and drafty places, to rest at room temperature.
8. When the wax is completely cool, trim the wick to 1/4" long. Wait four days before burning in order to settle the fragrance.
9. Add decorations or keep your design minimal. You can hot glue trim around the edge, add fun bits of paper to the glass with decoupage medium or tie a pretty ribbon around the edge.